Wednesday 22 October 2008


The final image ideas for the three calendars months will have to unique and be interesting. I have created a sketch of my final design to give me an in look into what the images will finally look like and to see if they meet the given requirements. These are the three design ideas that I have come up with:


  • May: The design for May is to create an image of a close-up of a flower with maybe a bug landing on one of the petals or flying about. The background will contain a blurry image of many of these flowers which will give the perception of perspective. These will also bring more attention to the main flower in these image.

  • July: The design for July is to create an image a table top with a few summer photos, a knocked over cocktail with spilt drink and a camera. The table will be made out of wood and the shadows will be created on it by using one of the lighting tools that we have learnt. I want the Image to have a relaxed feeling so all of the items will be scattered about casually. I also want this image to have an Indy style quality to it.

  • October: The design for October is to create an image of a Hand coming out of the ground clutching for air. The Scene will be a grassy clearing with a few scattered leaves about. I want the atmosphere to be dark and gloomy to give an eerie quality. To obtain this mood I will use lighting sparingly and use the ‘Volume light’ effect to create some fog.
In this weeks tutorial we learnt how to use Lighting to make the images look more realistic and atmospheric. We learnt how to use the lighting tools ‘Target Spots’ and ‘Omni’ lights. These tools are located in the ‘Lights’ tab which can be found by going to the ‘Create’ menu and then clicking on the button that looks like a lamp shining. The Create menu can be found at the right hand of the screen. The ‘Lighting’ menu gives you a lot of options to choose from but the main ones that I’ll be using is the ‘Target Spots’ and the ‘Omni Lights’.

The ‘Target Spot’ tool is a useful option because it allow the user to light up the image and create shadows that make the image look more realistic. There is also an option to change the different kind of light and the one that I found looked the most realistic was the ‘Mental ray shadow map’. This option creates more realistic shadows but it takes up a lot more memory which in turn will make the rendering time a lot slower. This tool allows the user to direct the light in any direction that they want and the amount of light that the light will produce. To allow the image to have shadows you will have to click on the light that you have placed on the scene and then go to the modifier tab. You then have to got the shadows menu and then click on for the shadows to appear. The changes to the modifiers parameters have to be made before you convert the image into an editable poly. If you didn’t make these changes before then it will be hard to gain the desired effect that your after.

The other tool that I used was the Omni lights. This tool allows the user to add as many lights as they like to a scene to gain the effect that they are after. They can place them anywhere on the scene. You can also change the affect that the light has like the ‘Target Spots’ and one of these options is ‘Volume Light’. This option makes the image look more eerie and creates a sort of fog effect.

Tuesday 14 October 2008

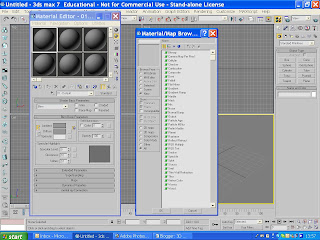
In this weeks tutorial we learnt how to use the ‘Material editor’ function. This option allows the user to add textures, highlights and colours to the 3D image. It can also be used to imitate textures and materials to make the objects seem more realistic. This is a very useful tool to use to complete my final image. To bring up the ‘Material editor’ menu you have to go to the menu bar at the top of the screen and then click on the button that looks like four balls that that are different colours. This is the Material editor tool button.

There are a few different ways in which you can create a texture or material for an object. The user can select a shader from the shader option menu such as ‘Orin-Nayer Blin’ shader or they can choose a ready made option. The ready made option can be found on the menu on the right hand side of the screen. A menu will scroll out with a list of different options and these include a Wood effect or a Planet effect options.

The user can also use their own textures to add to the image to give it a more realistic look and feel. To use your own texture you have to first create the texture. I used the program Adobe Photoshop to create it. I first created a 3cm by 3cm canvas and then I used a paint brush to create a pattern. I then saved the file to be used in 3Ds Max. I then selected a sphere from the boxes and then clicked on the clear box that is situated in the left hand box of called 'Basic Parameters'. I then choose the image that I wanted and then clicked 'OK'. I then dragged the textured sphere onto the relevant object. This option will be very useful when it comes to creating my final 3D images.

Sunday 5 October 2008


This is my Research Board for the month May. I have used all of the Images of things that I incorporate with May. I want to create my final 3D image by using ideas from my Mood and Research Boards.


This is my Mood Board for the month May. I wanted the image to portray the feeling of May which is fresh and optimistic. I used the image of a baby lamb which is what I think of most when I think of springtime. I then used flowers and butterflies to complete the image.

This is my Research Board for the month October. I have tried to research some images that give the same feeling as the Mood Board. I have created a very dark image that mirrors the Mood Board. I will create my final 3D image using these feelings and research to do so.


This is my Mood Board for the month October. I have tried to create a picture that mirrors the my feelings for the month October. I feel that this month is mysterious and spooky and I want to create a 3D image that incorporates these feelings.

This is my Research Board for the month July. I have used pictures of all of the things that I think about when thinking of July. I then used them to create the final image. I will use this Research Board and my Mood Board to create my final 3D image.


This is my Mood Board for the month July. I wanted it to feel warm and fun which is what July feels to me. I incorporated some words that came into my mind when i think about july.I created the image using the program Adobe Photoshop.