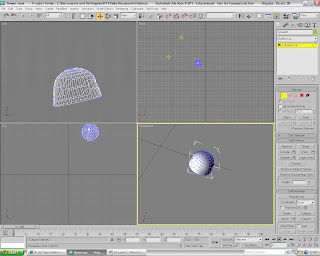
I first set the background picture which was called "img_9195". This gave me a reference point to start from and to build my picture. To set the background image I had to go to the 'Rendering' menu located at the top of the screen and then scroll down to 'Environment'. A pop up menu will then appear and I then clicked on the 'Environment map' and then added my own map for the background. After this i created a sphere by going to the 'Create' tab and then clicking on sphere. I then drew my required shape onto the stage.

This is the sphere that was created. This will be used for the center of the flower. It still hasnt been made into its final shape yet. I have also added some 'Omni lights' which will create the lighting for the stage. To create these lights I had to go to the lights option which is located in the main menu at the right of the sreen. I then selected the 'Omni lights' option and clicked on the screen where I wanted them to be placed. I had to be careful not to add to many because where ever you click on the screen an omni light would be placed there.

To create my desired look for the center of the flower I converted the sphere into a poly by right clicking on it and then clicking on 'Convert to..' and then scrolling to 'Convert to poly'. This allows me to modify the shape of the sphere. I first clicked on poly face option and highlighted the bottom half of the sphere. I then deleted it because it wasnt needed. I then selected the top half and then shaped it so it looked more organic and realistic.
This is what the center of the flower looks like after it had been modified. The petals will be created and they will be formed around the outside of the center to give the flower its shape. I then had to make the shape have a bit of texture to make it more realistic so I decided to add a bump map to it. To do this I opened up the 'Material Editor' Menu located at the top of the screen. I then clicked on a circle map and then scrolled down to the 'maps' options. This allows me to add maps to the different elements on the 3D Image. I then choose to add a map that I created using photoshop to the 'Bump map' option. I then changed the amount from 30 to 229. This then gave me the textured that I wanted.


No comments:
Post a Comment