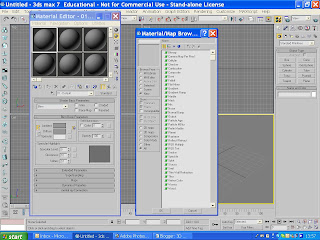
 In this weeks tutorial we learnt how to use the ‘Material editor’ function. This option allows the user to add textures, highlights and colours to the 3D image. It can also be used to imitate textures and materials to make the objects seem more realistic. This is a very useful tool to use to complete my final image. To bring up the ‘Material editor’ menu you have to go to the menu bar at the top of the screen and then click on the button that looks like four balls that that are different colours. This is the Material editor tool button.
There are a few different ways in which you can create a texture or material for an object. The user can select a shader from the shader option menu such as ‘Orin-Nayer Blin’ shader or they can choose a ready made option. The ready made option can be found on the menu on the right hand side of the screen. A menu will scroll out with a list of different options and these include a Wood effect or a Planet effect options.
The user can also use their own textures to add to the image to give it a more realistic look and feel. To use your own texture you have to first create the texture. I used the program Adobe Photoshop to create it. I first created a 3cm by 3cm canvas and then I used a paint brush to create a pattern. I then saved the file to be used in 3Ds Max. I then selected a sphere from the boxes and then clicked on the clear box that is situated in the left hand box of called 'Basic Parameters'. I then choose the image that I wanted and then clicked 'OK'. I then dragged the textured sphere onto the relevant object. This option will be very useful when it comes to creating my final 3D images.
1 comment:
Good job, looks really good and also stop chatting and get on with your work :p
Post a Comment